Wednesday, March 31, 2010

and she decreed... "let there be cake"


Last Friday was Gigi's birthday. Yes, that's right, the BIG 3-0. We celebrated with sushi, wine, beer and lots of laughter. And then as Marie Antoinette decreed, we had cake!

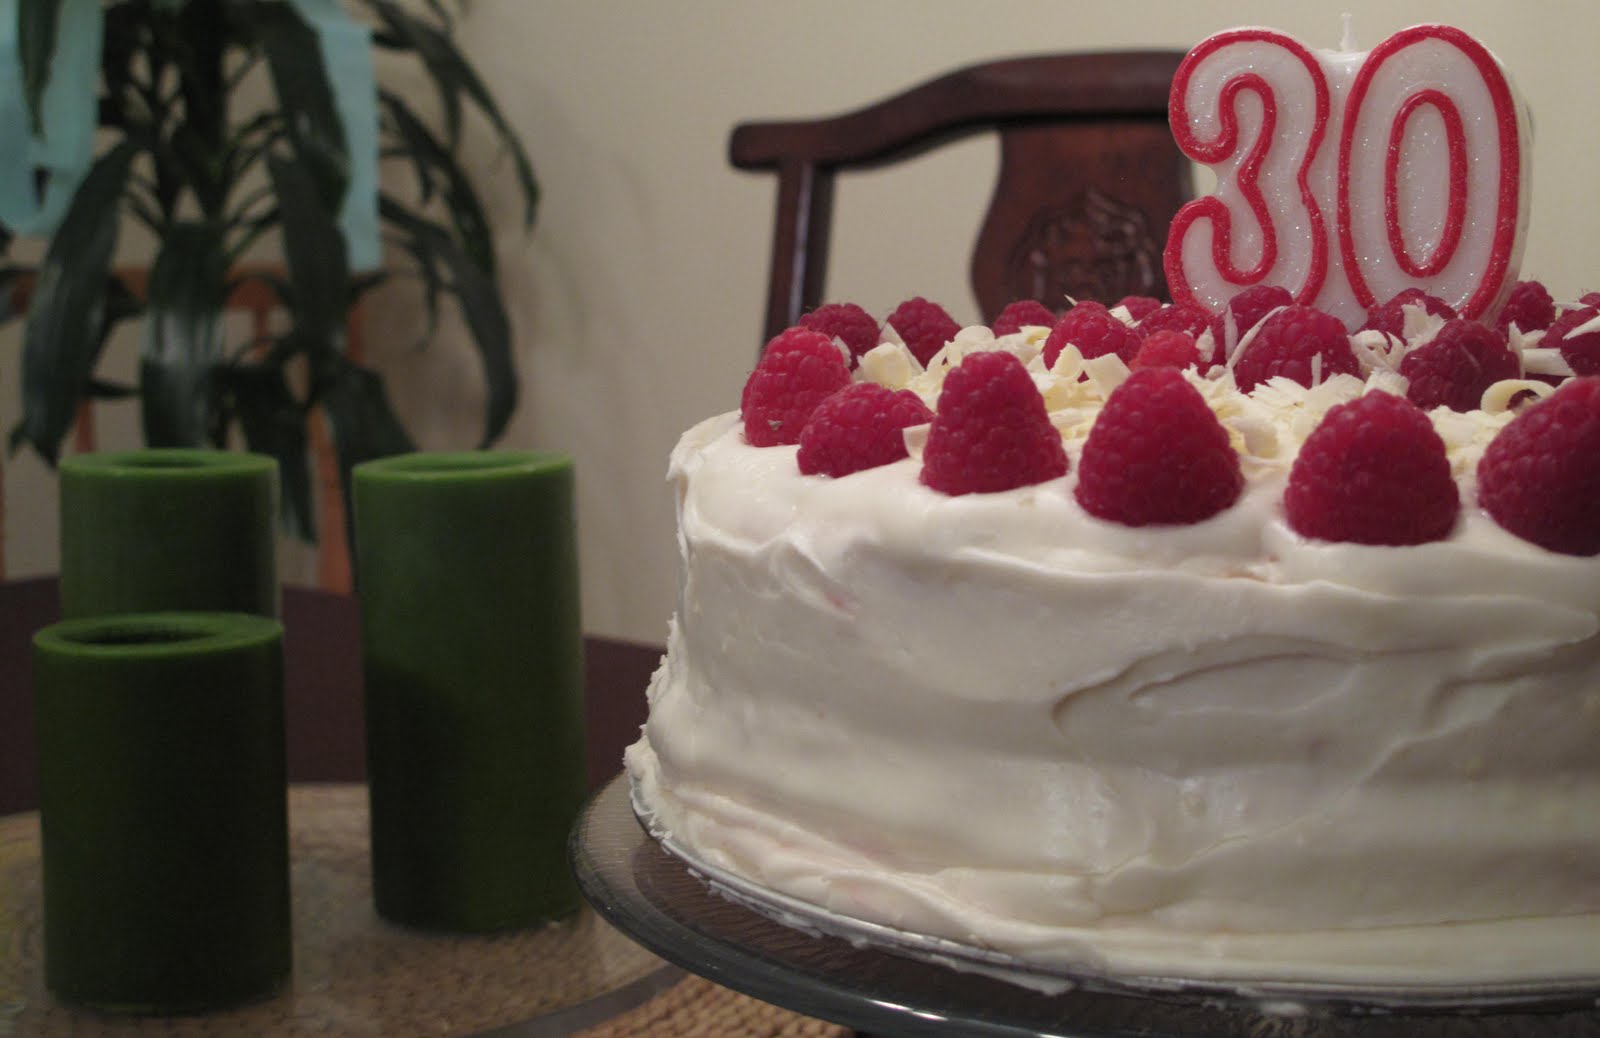
I decided to stay away from a dark or milk chocolate cake and baked a two layered white chocolate cake, filled with a raspberry buttercream (shockingly pink yes, but oh so delicious), covered with a cream cheese buttercream and then decorated with fresh raspberries and shaved white chocolate. Yes it tasted even better than it sounds...

The cake is dense enough to hold all that buttercream, and the tangyness of the cream cheese frosting balanced the sweetness from the raspberries. So much butter. So much sugar. So perfect! A little side note - it's best to bake the cake a day ahead - so that it has the chance to completely cool before being frosted.

Happy Birthday Gigi :0)

Essential White Chocolate Cake
to make two 9 x 2-inch round cake layers
ingredients:
2 ounces white chocolate, finely chopped
3 1/2 cup cake flour
1 tbsp + 1 tsp baking powder
1/2 tsp salt
6 egg whites, at room temperature
1 1/2 c. whole milk, at room temperature
1 c. butter, at room temperature
1 1/2 c. sugar
2 tsp vanilla

Preheat your oven to 350 F. Spray your two 9 inch rounds with nonstick spray and set aside.

Sift together the flour, baking powder and salt; set aside. Toss in the chopped white chocolate. In a medium bowl whisk together the egg whites and milk; set aside.

In the bowl of your stand-mixer, with the paddle attachment, beat the butter until soft and creamy (approx. 4 minutes). Add the sugar and beat until very light and fluffy - increase the speed from "stir" to about a 4. Scrape down the bowl a couple of times (beat for about 5 minutes). Add the vanilla.

Add the flour in 4 additions, alternating between the flour and milk/egg mixture, starting and ending with the dry ingredients. You want to beat until smooth on the stir speed after each addition.

Divide the batter evenly between the pans and smooth the tops (I tap my pans against the counter to get all the air bubbles out and it also levels out the batter). Bake for 35 minutes. Cool in the pans for about 10 - 15 minutes. Then remove them and allow to cool completely on wire racks.

Wrap in plastic wrap and store at room temperature if assembling within 24 hours.

Raspberry Buttercream
*everything here is estimations... since I really was playing it by ear
ingredients:
1/2 c. butter, room temperature
3 - 4 c. powdered sugar
1 - 2 tbsp raspberry syrup
1 1/2 c. raspberries, fresh or frozen

In the bowl of your stand-mixer you'll cream the butter and half the powdered sugar together - as it blends you should increase the speed. Then slowly add the syrup - I really did just estimate - no measurements when adding this ingredient. Add more powdered sugar to increase the volume of your frosting. Keep beating - this could mean that your stand-mixer is going to run for about 10 minutes... but that way you end up with that really fluffy, creamy texture and that's when you'll want to toss in your raspberries. Keep beating - especially if you are using frozen berries, so that the frosting loosens up and is easily spreadable.

The result is a bright pink buttercream with flecks of raspberry pieces tossed within.

Keep it at room temperature so that it is easy to spread (unless making ahead, then store in an airtight container in the fridge, and re-beat prior to using it to loosen it up again).

Grab your cakes, level them out (use a serrated knife) and spread a thick layer of the buttercream over the bottom layer - seriously, go to town with this - the more the happier your taste buds ;0) Then top with your second layer of cake.

Step number 3 (almost done... promise)

Cream Cheese Buttercream Frosting
ingredients:
1 package cream cheese (block), at room temperature
1/4 c. butter, room temperature
4 - 6 c. powdered sugar
1 - 2 tbsp whole milk
2 tsp vanilla

Grab that stand-mixer again! Using the paddle attachment, beat together the cream cheese and the butter (do this for about 3 minutes). Add half of the powdered sugar and increase the speed as everything combines, adding the vanilla and a bit of the milk - you want to reach that creamy, fluffy and smooth texture - so just the mixer going, adding more powdered sugar as you need it. I strongly encourage the taste-test method... taste the frosting as you make it; you don't want an overly sweet buttercream, you really want the tangy taste of the cream cheese to shine - it balances the overly sweetness of the raspberry buttercream.

I let the mixer go for about 10 minutes before I thought that the frosting had reached the proper consistency and flavour combination. Then I grabbed my big knife and spatula and covered the entire cake with a thin layer - this was a very thin layer that just got all the crumbs. Once that was done, I took the remainder of the frosting and completely covered the rest of the cake... a nice thick layer of frosting. Top with your fresh raspberries (a pint should do) and some shaved white chocolate (I used my vegetable peeler to shave some white chocolate onto the top of the cake).

I think even Marie Antoinette would have approved. A seriously awesome cake. I promise.

Tuesday, March 16, 2010

tapas galore!


This is another entry that really doesn't include a single recipe... only pictures of absolute goodness. I had the opportunity to finally try out an amazing Ottawa restaurant, Allium (on Holland Drive)... well, I think the few pictures I took speak volumes.

Highly recommended... I taste tested a roasted beet salad with pecans and an herbed goat cheese, absolutely decadent mac & cheese... seriously, just look at the picture! Tuna tartare with a crunchy won ton noodle and fish cakes topped with mango and avocado... sigh. Everything was just perfect. Top that off with some good wine and even better company... I would call that a perfect dinner.

I highly recommend Allium and their Monday night tapas menu... anyone have plans next week? ;0)

Friday, March 12, 2010

cake anyone?


Emily and I have been friends for... 12 years now. I met Emily on my first day in Ottawa; 10th floor Thompson Residence. We got along right away and stayed friends long after we checked out of residence and became the people we are today.

A few years back Em and I decided to run a 30 km race together... I would see her every week, sometimes twice in the same day: we would encourage each other by talking about... food. Sweet potato fries to be exact. We successfully completed the race and Em vowed never to do it again; so we came up with another way to spend time together... baking. Baking cakes to be exact.

This is our first collaboration. My colleague at work, Sylvie, asked if we could bake her daughter's engagement cake. She gave us the details - beach theme, date of the proposal and was specific about wanting a starfish or two. We rolled up our sleeves and decided to get baking.

I baked the cake (5 batters to be exact) and made the syrup. Em did the hard stuff. I bow down to my friend for being able to decorate this massive 14x14 cake.

I am so excited to share the results with you. As you can see, a marbled cake with vanilla buttercream icing was taken to the "beach" to celebrate a happy couples engagement. I think that Emily was able to capture exactly what Sylvie was asking for...starfish and all ;0)

I love that not only do I get to bake cakes, but I get to spend time with Em. This is even better than those runs... since not only do we get to talk about food, but we get to sample it too!

Monday, March 8, 2010

just a bite


Sometimes all you want, all you need, is one bite. One bite of something sweet... one bite of home baked goodness. These mini muffins are those little bites (well, more like 3 bites, unless you're in a hurry).

I've said it before, and I'll say it again, oatmeal chocolate chip muffins remind me of my mom; of being a kid and the excitement of coming home from school to a freshly baked treat. I decided to take the classic recipe and make mini muffins... they baked up perfectly, with slightly golden puffed tops...super cute and absolutely delicious. Who doesn't love a muffin? Especially one that brings you right back home, sitting in the kitchen with your mom. :0)

*Special note for Abigail... these could be perfect for your "coffee, cake, 1000 words per day" goal... only substitute the muffins for the cake ;0)

Traditional Oatmeal Chocolate Chip Muffins (mini sized)
ingredients:
1 c. buttermilk
1 c. oatmeal (not instant)
1/3 c. packed brown sugar
1/4 c. vegetable oil
1 egg
1 c. all-purpose flour
1 tsp baking powder
1/2 tsp baking soda
1/2 c. mini dark chocolate chips (I used mini since the muffins were going to be mini)

Preheat your oven to 400 F. Line your mini muffin tin with paper liners - I was able to get 24 muffins out of the batch.

In a large bowl, mix together the buttermilk and the oatmeal; then allow them to sit for about 10 minutes or so.

While you're waiting, combine the flour, baking powder and baking soda together in a medium bowl. Set aside.

Go back to the soaked oats and use a large spatula to stir in the egg, the brown sugar and the oil. Add the flour mixture to it and stir to just combine (you'll see, all it takes is a few strokes). Toss in your chocolate chips, incorporate those and, voilĂ ! Your muffin batter is done.

Grab your mini-ice cream scooper and scoop out the batter evenly into each muffin liner - you want the batter to hit the top (so that you get a nice puffed up effect once baked).

Bake for about 12 minutes (I checked at 10 minutes and then added a couple more minutes for good measure). Remove from the oven, allow to sit in the muffin tin for another 10 minutes and then allow to cool completely on a wire rack... but really, why wait?

Tuesday, March 2, 2010

an addition to the kitchenaid family


According to a source very close to me... recipes are for chumps! I found that slightly ironic since this blog is dedicated to sharing recipes with other people... however, being a "go with the flow" type of gal, I decided to ignore the urge to write down (or use) a recipe and simply take pictures of our Saturday night cooking adventure.

I finally got my pasta attachments for my kitchenaid - ever since trying my hand at making pasta I've been obsessed with making more (to be honest, I'm normally the person who is pretty underwhelmed at the thought of a pasta dinner)... and so was thrilled when I got to bring home my new toy!

Tastes of summer on a cold February evening... the freshness of lemon and parsley just exploded in my mouth as I eagerly devoured my bowl of linguine. Have I mentioned that it's delicious? And super simple. And I think everyone should try it... even if you don't have a pasta maker - just come on over to my place... I guess I just extended an open invite! I'd be more than happy to roll out the pasta for you... I'll just need to find a recipe ;0)